If you’re building a web application, mobile app, or SaaS dashboard, adding Google Sign‑In is one of the most user‑friendly authentication methods available. But before you can let users log in with their Google account, you need two critical pieces: a Google Cloud Client ID and a Client Secret.
Why You Need a Google Client ID & Secret
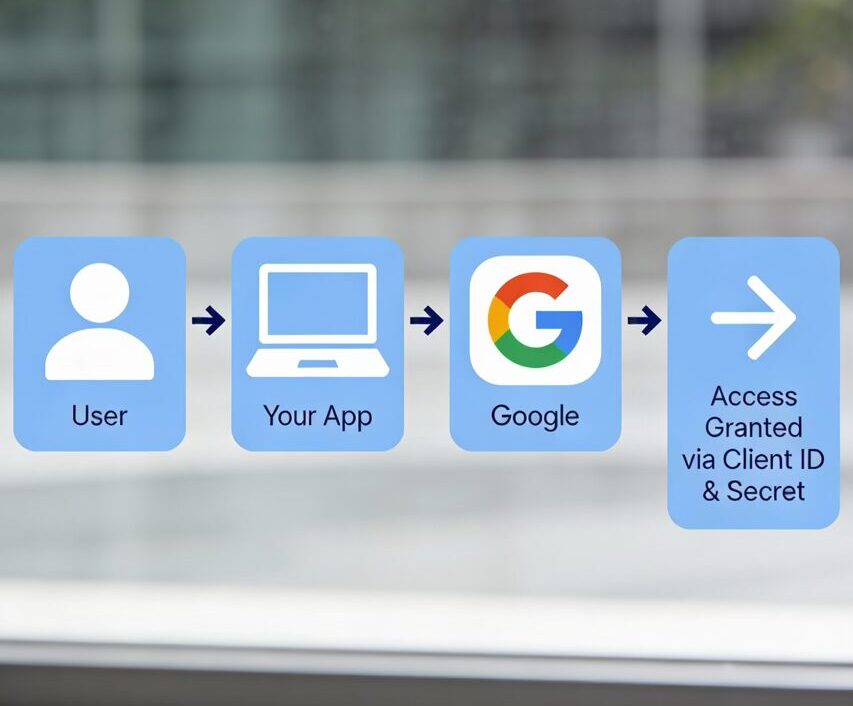
These credentials act as the “bridge” between your application and Google’s authentication servers. The Client ID is a unique identifier that tells Google which application is requesting access, while the Client Secret is a confidential key that proves your app is authentic. Together, they enable the OAuth 2.0 authentication flow that powers Google Sign‑In.
Whether you’re building:
- A web application with Google Sign‑In
- A mobile app with “Login with Google”
- A SaaS dashboard that integrates with Google APIs (Gmail, Drive, Calendar, etc.)
- A backend service that needs to access Google services on behalf of users
…you’ll need a Client ID and Client Secret. This guide walks you through the entire process in under 10 minutes, with screenshots and best practices included.
Prerequisites: What You’ll Need Before Starting
Before we dive into the steps, make sure you have the following:
- A Google Account – This can be any Gmail account or Google Workspace account. You’ll use this to access the Google Cloud Console.
- Decide Your Application Type – Determine whether you’re building a web application, Android app, iOS app, or desktop application. Google requires different credential types for each.
- Know Your Redirect/Origin URLs – You’ll need to provide Google with the URLs where your app will redirect users after they authenticate. For example:
- Local development: http://localhost:3000 or http://localhost:8080
- Production: https://yourapp.com or https://auth.yourapp.com
- Read Access to Google Cloud Console – If you’re in a team, make sure you have permissions to create projects and credentials.
Pro Tip: If you don’t have these URLs yet, you can always add them later or update them as your app grows. Google allows you to edit your credentials after creation.
Step 1: Create or Select a Google Cloud Project
Every Google API credential must belong to a Google Cloud Project. Think of a project as a container for all your API credentials, billing, and settings.
 1")
How to Create a Project
- Open the Google Cloud Console: Go to https://console.cloud.google.com
- Log in with your Google account (if you’re not already logged in)
- Select or Create a Project:
- At the top of the page, you’ll see a project selector dropdown (it may say “Select a Project” or show your current project name)
- Click on it to open the project list
- Create a New Project:
- Click the “New Project” button
- Enter a Project Name (e.g., “My App Authentication” or “Devbo OAuth Setup”)
- Optionally select an Organization (if you’re part of a Google Cloud Organization)
- Click “Create”
- Wait for the project to be created – This usually takes 30 seconds to 1 minute. Google will automatically switch to your new project.
Note: If you already have a Google Cloud project, you can skip this step and use your existing project.
Step 2: Configure the OAuth Consent Screen
Before Google allows you to create OAuth credentials, it requires you to set up an OAuth Consent Screen. This is the screen that users see when they’re asked to grant your app permission to access their Google data.
 2")
Why the OAuth Consent Screen Matters
Google requires this for security and transparency. It ensures users know exactly what app is requesting access and what data it’s asking for.
Configure Your Consent Screen
- Navigate to OAuth Consent Screen:
- In the left sidebar, go to APIs & Services → OAuth consent screen
- If you don’t see this menu, make sure you’re in the correct project (check the project selector at the top)
- Choose User Type:
- Select either “External” (for apps available to any user) or “Internal” (for Google Workspace organizations only)
- Most developers choose “External” for public applications
- Click “Create”
- Fill in the OAuth Consent Screen Form:
App Information:
- App name: Enter the name of your application (this is what users will see)
- User support email: Enter an email address where users can reach you with questions
- Developer contact information: Provide your email address(es)
Branding & Scope:
- App logo: (Optional) Upload your app’s logo
- Scopes: For now, you can leave this as is. Scopes define what data your app can access from Google (e.g., email, profile, Drive files)
Links & Policies (Required for External apps):
- Privacy policy URL: Provide a link to your app’s privacy policy (e.g., https://yourapp.com/privacy)
- Terms of service URL: Provide a link to your terms of service (e.g., https://yourapp.com/terms)
- Authorized domains: Add your app’s domain(s) without the protocol (e.g., yourapp.com, app.yourapp.com)
- Save and Continue:
- Click “Save and Continue”
- Follow through any remaining steps (Google may ask you to review your choices)
- Click “Back to Dashboard” when finished
Important: Your OAuth consent screen must be published before users can log in. If it remains in “Testing” mode, only test users you explicitly add can use it.
Step 3: Create the OAuth 2.0 Client ID & Secret
Now for the main event – creating your Client ID and Client Secret.
Generate Your Credentials
- Go to the Credentials Page:
- In the left sidebar, click APIs & Services → Credentials
- You should see a page with options to create credentials
- Create a New Credential:
- Click the “+ Create Credentials” button (usually at the top)
- From the dropdown, select “OAuth client ID”
- Select Your Application Type:
- Web application – For websites, web apps, and backend servers
- Android – For Android mobile apps
- iOS – For iPhone/iPad apps
- Desktop – For desktop applications
- For most developers, select “Web application”
- Configure Your Client ID:
Name:
- Give your credential a descriptive name (e.g., “Web App Client” or “Production OAuth Client”)
- This helps you organize credentials if you have multiple
Authorized JavaScript Origins (for web apps):
- Add all the origins where your app will load from
- Examples:
- http://localhost:3000 (development)
- http://localhost:8080 (alternative local port)
- https://yourapp.com (production)
- https://www.yourapp.com (with www)
- Click “Add URI” for each origin
- Do NOT include paths (e.g., don’t use https://yourapp.com/login)
Authorized Redirect URIs (critical):
- These are the URLs where Google will redirect users after they authenticate
- This is where your app’s backend will receive the authentication code
- Examples:
- http://localhost:3000/auth/callback (development)
- https://yourapp.com/auth/callback (production)
- https://yourapp.com/api/oauth/google/callback (backend handler)
- Click “Add URI” for each redirect URL
- Important: These must match exactly. Even a trailing slash difference will cause errors.
- Create the Credential:
- Click the “Create” button
- A dialog will appear showing your Client ID and Client Secret
- Save Your Credentials Safely:
- Copy your Client ID (public – safe to share)
- Copy your Client Secret (private – keep this secret!)
- Store these in a secure location (environment variables, secret manager, password manager)
- Do not paste this into your code directly
What You’ve Just Created
- Client ID: A unique identifier for your app (looks like abc123def456.apps.googleusercontent.com)
- Client Secret: A confidential key that only you and Google know (keep this private!)
- These two pieces work together to authenticate your app with Google
Step 4: Using Your Client ID & Secret in Your App
Now that you have your credentials, here’s how to use them. The exact implementation depends on your framework, but the principles are the same.
General Approach
For Frontend/Web Apps:
- Use your Client ID when setting up the Google Sign‑In button or JavaScript SDK
- The Client ID is public – it’s safe to include in your frontend code
- Example (Google Sign‑In Button):
<div id=”g_id_onload”
data-client_id=”YOUR_CLIENT_ID.apps.googleusercontent.com”
data-callback=”handleCredentialResponse”>
</div>
<div class=”g_id_signin” data-type=”standard”></div>
For Backend Applications:
- Use both Client ID and Client Secret in your backend code
- Store the Client Secret in environment variables, never commit it to Git
- Example (Node.js/Express):
const CLIENT_ID = process.env.GOOGLE_CLIENT_ID;
const CLIENT_SECRET = process.env.GOOGLE_CLIENT_SECRET;
const REDIRECT_URI = “https://yourapp.com/auth/callback”;
// Use these to exchange authorization code for access token
Store Secrets Securely:
- Use a .env file (add to .gitignore) or environment variables
- For production, use your hosting provider’s secret management (Vercel, Heroku, AWS Secrets Manager, etc.)
- Never commit secrets to version control
Security Best Practices
Protecting your credentials is essential. Follow these guidelines:
1. Treat Your Client Secret Like a Password
- Never commit it to Git – Add it to .gitignore immediately
- Never hardcode it in your app – Use environment variables or secret managers
- Never share it publicly – Don’t post it on GitHub, StackOverflow, or in screenshots
2. Use Environment Variables
Store secrets outside your codebase:
# .env (local development, added to .gitignore)
GOOGLE_CLIENT_ID=abc123.apps.googleusercontent.com
GOOGLE_CLIENT_SECRET=your_secret_here
GOOGLE_REDIRECT_URI=http://localhost:3000/auth/callback
For production:
- Vercel: Environment Variables in Project Settings
- Heroku: Config Vars
- AWS: Systems Manager Parameter Store or Secrets Manager
- Docker: Use secrets or environment variables at runtime
3. Rotate Secrets if Exposed
If your Client Secret is accidentally exposed:
- Go back to APIs & Services → Credentials
- Find the exposed credential
- Click the options menu (three dots) and select “Delete” or “Regenerate Secret”
- Update your environment variables immediately
4. Restrict Your Authorized URLs
- Only add the domains and redirect URLs you actually need
- For development, use localhost URIs
- For production, use your production domain only
- If you deploy to multiple domains (staging, production), add both but keep them separate from localhost
5. Review Your Credentials Regularly
- Go to APIs & Services → Credentials periodically
- Delete any unused credentials
- Delete test credentials before going to production
- Keep a record of which credential is used for which environment
Common Issues & How to Fix Them
Even with clear instructions, you might encounter issues. Here are the most common ones:
Error: “redirect_uri_mismatch”
What it means: The redirect URL you’re using in your code doesn’t match what you registered in the Google Cloud Console.
How to fix it:
- Go to APIs & Services → Credentials
- Click on your OAuth 2.0 Client ID
- Check your Authorized Redirect URIs list
- Ensure the URL in your code matches exactly (including protocol, domain, path, and trailing slashes)
- If needed, add a new URI and save
Example:
- ✅ Correct: https://yourapp.com/auth/callback
- ❌ Wrong: https://yourapp.com/auth/callback/ (extra trailing slash)
- ❌ Wrong: http://yourapp.com/auth/callback (wrong protocol)
Error: “The Oauth consent screen has not been configured”
What it means: You haven’t set up your OAuth consent screen yet, or it’s not published.
How to fix it:
- Go to APIs & Services → OAuth consent screen
- If the screen is incomplete, fill in all required fields (app name, support email, privacy policy, terms of service)
- Make sure the status shows “Published” (not “In review” or “Testing”)
- If it’s in “Testing” mode and you want external users to log in, submit it for verification
Error: “Consent Screen Not Appearing”
What it means: Users aren’t seeing the consent screen when logging in.
How to fix it:
- Verify your OAuth consent screen is published and not in “Testing” mode
- Check that you’re using the correct Client ID in your code
- Make sure the scopes you’re requesting are actually defined in your consent screen
- Clear your browser cache and cookies, then try again
- Test in an incognito window to ensure cookies aren’t interfering
“Invalid Client” Error
What it means: Your Client ID or Client Secret is incorrect or malformed.
How to fix it:
- Go to APIs & Services → Credentials
- Click on your OAuth 2.0 Client ID to view details
- Copy your Client ID and Client Secret again from the console
- Verify they’re pasted correctly in your code (watch for extra spaces or typos)
- If unsure, regenerate your secret and update your environment variables
“origin_mismatch” Error
What it means: The origin where your app is loading from isn’t authorized.
How to fix it:
- Go to APIs & Services → Credentials
- Edit your OAuth 2.0 Client ID
- Add the origin in Authorized JavaScript Origins
- Origins should be just the protocol and domain: https://yourapp.com (no path)
- For local development, add http://localhost:3000
Frequently Asked Questions
Q: Where do I find my Google Client ID if I forgot it?
A: You can always find it by:
- Going to Google Cloud Console
- Selecting your project
- Going to APIs & Services → Credentials
- Your OAuth 2.0 Client ID will be listed there with the ID visible
Q: Can I use the same Client ID for web and mobile?
A: No. Google requires separate credentials for each platform:
- Web applications need a “Web application” OAuth 2.0 Client ID
- Android apps need an “Android” credential
- iOS apps need an “iOS” credential
You can create multiple credentials in the same project for different platforms.
Q: Is my Client ID secret?
A: No, your Client ID is public. It’s safe to include in your frontend code and share. Your Client Secret is what you must keep private.
Q: Can I use localhost for production?
A: No. You must use your actual domain (https://yourdomain.com) for production. Localhost is only for local development.
Q: How do I disable or delete a Client ID?
A: Go to APIs & Services → Credentials, find your OAuth 2.0 Client ID, click the options menu (three dots), and select “Delete”. This will immediately revoke all access tokens issued with that credential.
Q: What’s the difference between Client ID and API Key?
A:
- Client ID (OAuth 2.0): Used for user authentication and authorization. Users grant your app permission to access their data.
- API Key: Used for accessing public APIs without user authentication (e.g., Google Maps, Geocoding). Not recommended for sensitive operations.
For Google Sign‑In, you need a Client ID, not an API Key.
Q: How often should I rotate my Client Secret?
A: There’s no required rotation schedule, but best practices suggest:
- Rotate quarterly if the secret is in high-risk environments
- Rotate immediately if exposed
- Rotate before transferring projects between teams
Q: Can I have multiple Client IDs for the same app?
A: Yes. You might want separate credentials for:
- Development, staging, and production environments
- Different platforms (web, Android, iOS)
- Different integrations or third-party services
Create a new credential for each use case and label them clearly.
Summary
You now have everything you need to add Google authentication to your app:
✅ Created a Google Cloud Project
✅ Configured your OAuth Consent Screen
✅ Generated your Client ID and Client Secret
✅ Learned how to use and secure them
✅ Understood common errors and how to fix them
Your Client ID and Client Secret are the keys that unlock Google Sign‑In for your users. Keep your secret safe, follow best practices, and you’ll have a secure, user-friendly authentication system in minutes.
If you run into any issues, check the “Common Issues & Fixes” section or refer to Google’s official OAuth documentation.
Happy building! 🚀